Feeds RSS
Feeds RSS

Saturday, July 31, 2010

Foot Care Tips For Healty Feet - Part 1


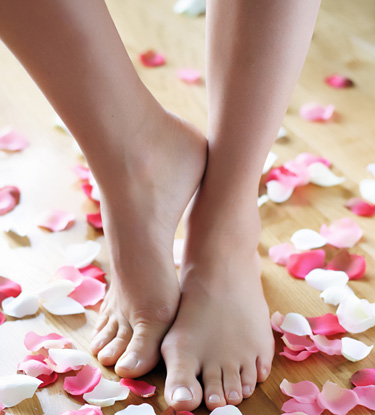
Looking after your feet should be an important daily health care routine to help prevent minor problems and keep feet in a healthy condition. Hey..of course you need a healthy feet to look good in your stilettos da....so stinky and ugly feet..step aside please..hahaha...It's never too early or too late to start caring for your feet, here's how...

#1 - Indentify your foot problems and tackle it the proper way.


Athlete's Foot- this is a common fungal infection that can lead to intense itching, cracks, blisters, redness and scalling. The cleft between the fourth and fifth toes is the most frequently affected, with moist soft skin that peels off easily. The main risk factor is that it is a highly contagious fungal infection and it can spread between toes.
What to do: For athlete's foot where the skin conditions are dry. If it occurs on a dry area such as your heel, you need to restore moisture by rubbing in an anti-fungul cream. However, don't forget to wash you hands thoroughly afterwards. For athlete's foot where the skin condition have been moist. Wash your feet in warm water as hot water will only make your feet fungus-friendly. Then dab dry with a clean towel. Although the skin may appear flaky and dry- never use moisturizer between the toes. Talcum powder can help to keep the feet dry, reducing the opportunity for fungus to flourish. Always seek medical advice when the scaling get worse.

Corns and Calluses - Excessive pressure from our body weight on the heel and on the ball of the foot is bound to thicken some areas of the skin, in the form of corns and calluses, as a protective response. It is the body's reaction to pressure or friction, and can appear when the skin rubs against a bone, a shoe, or the ground. Some people have a natural tendency to form calluses because their skin type.
What to do: You can control a small amount of hard skin by gently rubbing with a pumice stone occasionally when you are in the bath. Use a moisturizing cream daily.

Sweaty feet - This can be a persistant problem which can be embarrassing and uncomfortable. Sweaty feet is caused by stress on the foot, due to strain or fatigue. Hot weather can make matters worse, although it can also be an inherited condition.
What to do: Do not wear shoes that are made of synthetic materials. Man-made fabric can actually contribute to the production of much perspiration. Sweating beyond certain limits may also be due to hereditary reasons. Always consult your doctor if you experience excessive sweating.

Cracked heels - Dry, cracked heels are caused by dry skin called Xerosis. The edge of the heel can have a thicker area of skin and look rough, dry, scaly, and hardened around the rim. This problem can develop due to the way a person walks and the weight put on the heel area of the foot.
What to do: A twice-daily application of any good moisturizing cream is very effective in preventing dry, cracked heels. The use of a pumice stone can reduce the thickness of the hard skin and make it easier for the application of the moisturizing cream to penetrate deeper into the skin.

Foot pain can be very discomforting in the regions where it usually occurs such as the heel, toes, arch, instep, sole or ankle. It can be the result of many things, including wearing ill-fitting shoes, high heels for long periods, due to a sports injury, or even aging.
What to do: Indentify what causes the pain and seek professional treatment if the discomfort is prolonged. Relax your feet at home by keeping them at an elevated position. Also do some exercises to get the circulation going. The elevation of your feet should be at about 45-degree angle to your body. Stay in this position and relax for about 15-20 minutes.


Friday, July 30, 2010

Quickie Makeup


How much time do you spend on your make-up everyday? 10 minutes, 20 or maybe 30?

Ladies - tired of your partner banging on the bathroom door because your complicated make-up routine has made you late for that dinner party and feeling guilty about arriving late for work because of it. Well, don't: here is some tips for you to save more time on make-up but still make your look stand out from the crowd...you'll be ready in no time..

SKIN - 1 minute


Dot some concealer on your under-eye area to diminish dark circles then smooth a blob of tinted moisturiser evenly on your face. Brush some sheer loose powder all over for a silky finish.

EYES - 5 minutes
Go for smoky eyes. It's popular, trendy and looks absolutely flattering on anyone. Brush a bronzy brown or golden shade on your entire lid and then blend with a light brown shadow extending beyond the outer corner of your eyes. Line your upper and lower lids using dark eyeliner if you wish to glam up that appeal. Thicken your lashes with a sweep of water proof mascara for longer resistance and no smudges!


CHEEK - 20 seconds

Cream blushers are the simplest and speediest to apply. Smile and dot some on the apple of your cheeks. Use your fingers, rubbing in small circular motions to even out the colour for a natural flush.


LIPS - 10 seconds
You wouldn't want to mess around with lipsticks when you're in a rush. 3 to 4 glosses of sheer pink gloss work like a charm. Bear in mind, it's also light to carry in your handbag for easy touch ups.


HAIR - 5 minutes

Gather your hair in a messy updo. Use your finger to comb hair back and make sure the top is smooth before tying it into a low ponytail. Twist the ponytail up to your crown, shape into a bun by slowly tucking it in then secure with bobby pins. A light misting of glitter hairspray will make your hair stay in place with a dazzling finish.

Thursday, July 29, 2010

Nut Caramel

Ingredients

• 1 cup butter (no substitutes)
• 2-1/4 cups packed light brown sugar
• Dash salt
• 1 cup light-colored corn syrup
• 1 14-ounce can sweetened condensed milk
• 1-1/2 teaspoons vanilla
• 3/4 cup coarsely chopped nuts
Directions
1. Butter a 9x9x2-inch pan and set aside (do not overbutter or the caramels will be greasy).
2. Melt butter in a heavy 3-quart saucepan over medium heat; stir in brown sugar and salt. Stir in corn syrup. Slowly pour in milk, stirring constantly until combined. Using a candy thermometer, cook to 248 degrees F (about 25 minutes), stirring occasionally (the mixture will be very bubbly). Remove saucepan from heat and stir in vanilla and nuts. Immediately pour into prepared pan.
3. Let candy cool completely before cutting into 1-inch squares. Wrap each square in waxed paper or plastic wrap and store in an airtight container at room temperature. Makes about 2 pounds (about 64 pieces).

Candy GAGA - the recipe

This year Hari Raya...why dont we try something new to impress friends and family..say..with our own making CANDY perhaps...homemade candy le kira tuh..huhuhu..:)

Here are some simple and nice recipe to try..(I havent try it yet, looks very luscious ). why dont you try it first...then let me know..hehehe..

Nutty Chocolate


Ingredients
• 1 12-ounce package semisweet chocolate pieces (2 cups)
• 2/3 cup sweetened condensed milk (one-half of a 14-ounce can)
• 1 tablespoon water
• 3/4 cup chopped walnuts, toasted if desired
• 1 teaspoon vanilla

Directions
1. Line a cookie sheet with waxed paper; set aside. In a medium microwave-safe bowl, combine chocolate pieces, sweetened condensed milk, and water.
2. Microwave, uncovered, on 100% power (high) for 1 minute; stir. Microwave about 1 minute more, or until chocolate is melted and mixture is smooth, stirring every 30 seconds. Stir in nuts and vanilla. Pour mixture onto prepared cookie sheet and spread it into a 9x6-inch rectangle, or drop mixture by rounded teaspoons onto prepared cookie sheet.
3. Chill fudge about 30 minutes or until firm. Cut fudge into 1-1/2-inch squares. Makes 24 pieces


Coconut Chashew Praline


Ingredients

• 1-1/2 cups granulated sugar
• 1-1/2 cups packed brown sugar
• 1 cup half-and-half or light cream
• 3 tablespoons butter
• 2 cup lightly salted roasted cashews
• 1 cup flaked coconut, toasted*

Directions

1. Butter the sides of a 2-quart heavy saucepan about 7 inches in diameter.** In saucepan combine granulated sugar, brown sugar, and half-and-half. Cook and stir over medium-high heat until mixture boils. Clip a candy thermometer to side of pan. Reduce heat to medium-low; continue boiling at a moderate steady rate, stirring occasionally, until thermometer registers 234 degree F, soft-ball stage (16 to 18 minutes).
2. Remove saucepan from heat. Add butter, but do not stir. Cool, without stirring, to 150 degree F (about 30 minutes).
3. Remove thermometer from saucepan. Stir in cashews and coconut. Beat vigorously with a clean wooden spoon until mixture just begins to thicken but is still glossy (about 3 minutes).
4. Working quickly, drop candy by spoonfuls onto waxed paper. Let stand until firm. Store tightly covered for up to 1 week. Makes about 60 candies.
5. *Toasting Coconut: Spread the coconut in a single layer in a shallow baking pan. Bake in a 350 degree F oven for 5 to 8 minutes or until light golden brown, watching carefully and stirring once or twice so the coconut doesn't burn.
6. **Note: A saucepan with a smaller diameter will not allow the proper evaporation needed in candy making.

Candy GAGA


Humans will always be in love with everything nice and sweet. In fact, the way we crave for anything sugary is something inherent and inescapable. This is probably the reason why people from all ages are such candy fans. Admit it or not, we all love candy and this is probably the reason why these adorable sweeties never go out of trend. For as long as we're around, there will always be candies in the world. Wholesale or retail, there will always be a market for these goodies. And when it comes to satisfying that sweet tooth, retro sweets are always on top of the list.

We've had great friendships over these sweet tooth adventures and we've had such great memories of that local candy store that almost felt like our second home. In short, candies were and are very much a part of our lives and there is quite an interesting history behind this.

This human candy craze started with our prehistoric fathers stealing honey from beehives which was quite dangerous but quick to satisfy their sweet tooth cravings. From beehives, man started to enjoy the sweet juices of plants like sugarcane and corn while mixing them with water, fats, nuts and even chocolate. This eventually laid down the bricks for all the candy varieties we know today. Then and now, man always knew what to look for in candy which is simply a sweetness regardless of the ingredients used.

Indeed, man has come a long way when it comes to satisfying his insatiable sweet tooth. Today, those unforgettable retro sweets are a celebration of all things sweet and lovely.

Thursday, July 22, 2010

If The Shoe Fits!


While these tips won't actually make you thinner, they will help you choose the right women's shoes and accessories for a thinner appearance.


Shoes with Heels will Make Your Legs Appear Thinner

The heels don't have to be terribly high, but there's no doubt that if you want to appear slimmer, a bit of a heel will help dramatically.


Pointy Toe Shoes will Help Make Legs Appear Longer

If your legs look longer, they will also appear thinner - and shoes with pointy toes will help make your legs seem longer. So, even if you think your legs are long enough, if it's a thinner appearance you're after, try a shoes with pointed toes.


Match Your Shoes to Your Hose or Tights

Matching your shoes to your hose or tights, when wearing a skirt or a dress will help your legs look thinner. If your skirt is also in a matching color, you'll look thinner from the waist down. Avoid wearing light-colored hose with dark shoes and a dark skirt.


Opened-Toed Shoes

Shoes with an open toe or high heeled sandals will give your thighs and calves a slimmer appearance than a closed-toe shoe will.


Avoid Shoes with Ankle Straps

Shoes with ankle straps will give the appearance of shorter legs and, as discussed above, longer seems thinner whether it is or not - so skip the ankle straps if you want your legs to look slimmer.


Wear Slingback or Backless Shoes

If you wear backless or slingback shoes instead of pumps, your legs will look thinner and longer.

Head Over Heels

Hello ladies.......

I list here some of the best thing about high heels..coz I just need some excuses for wearing them without feeling guilty :)

These are some of my collection.


https://blogger.googleusercontent.com/img/b/R29vZ2xl/AVvXsEhSBq9zVhhpHQUPFli2O2G7Ltt18Niq8GQCxSbFUyGw5VhtUstWKPOaCC31-hpq-uJ84dwEpFlCe2GYbv82pIJkInXQDwieW69rMsndwxxztYunsH9AYUradYVS0fS9uCRlkTmlf9kxcUUM/s1600/09112009657.jpg

Things to Love about high Heels


1) High Heels Make You Taller

Vertically challenged women everywhere will tell you how they love their heels. But, even if you don't need extra height, having it can make you feel good. It's truly a heady feeling to slip on a pair of shoes and instantly be 3 or 4 inches taller, and reaching things on the top shelf, well, it's a high like no other.

2) High Heels Don't Make You Look Fat

Unlike skinny jeans, cropped leggings, or whatever other torturous styles are appearing on the runways, high heels won't make you look fat. Granted, some styles are more flattering than others, but as a general rule, heels are more slimming than flats.

3) High Heels Can Make an Outfit

Even a pair of jeans and a t-shirt can take on an entirely different look when a pair of heels is added, and nothing can make a plain skirt pop like the perfect pair of pumps or sandals. Heels add a feminine touch to suits as well.

4) High Heels Make You Feel (and Look!) Sexy

Just putting on a pair of sexy high heels can make you feel sexier, but they also can make you look sexier. High heels change our body stance, making our calf muscles more pronounced, and forcing our butts and chests out -- it's nearly as if high heels force us into better posture ... and good posture is always sexy.

5) High Heels Don't Have to Cost a Fortune

While it's easy to spend a fortune on high heels, even inexpensive brands can look great. In fact, there are few things that can cost as little and make you feel quite as happy, as a pair of killer heels.


Luckily for most of us, the skinny on skinny jeans is that you don’t actually have to be skinny. Indeed, the operative word in this style refers to the cut of the pant, and not the wearer: they are long and narrow, hence, skinny.

If you’re not waif-thin like today’s hottest models and most popular celebrities, don’t worry, you can still pull the look off. Begin with a slightly-modified skinny jean; instead of a legging-style denim pant, go with a flattering straight-legged pant that doesn’t hug your ankle tightly. They won’t have a bootleg, but they won’t be skintight, either.

Second, remember your favorite “black is slimming” mantra. The same goes for skinny jeans, which have the potential to make you look long and lean, if you buy them in dark blue or gray-black. Pair the jeans with a flattering top that will add balance to your outfit, preferably something sexy and loose, like your favorite empire-waist top or flowing tunic.

Lastly, for your new outfit’s coup de gräce, pair it with sexy heels. Make sure that your pant leg ends mid-heel, and your legs will look instantly longer, sexier, and more appealing. Now if that isn’t flattering, I don’t know what is.

courtesy of Redcarpetvictim

Tuesday, July 20, 2010

PHILLY OREO Cheesecake

This was the first ever cheesecake I had made and I was so worried that it might come out wrong or that it would be to hard for me to make right. But then I was so wrong….I made this for a trial and it was so easy and turned out SOO GOOD! Everyone loved it.... Of course you have to wait the whole 24 hours to set it right but it was definitely worth the wait! It tasted best after a week so definitely wait at least a day!

Here is a great cheesecake recipe for anyone with a sweet tooth! With this simple recipe, you can prepare this cheesecake at home like a pro!

I've taken this recipe from kraftrecipes.com


PHILLY OREO Cheesecake


What You Need
1 pkg. (1 lb. 2 oz.) OREO Cookies, divided
1/4 cup (1/2 stick) butter or margarine, melted
4 pkg. (8 oz. each) PHILADELPHIA Cream Cheese, softened
1 cup Sugar
1 tsp. Vanilla
1 cup BREAKSTONE'S or KNUDSEN Sour Cream
4 Eggs
Make It
HEAT oven to 325ºF.
LINE 13x9-inch pan with foil, with ends of foil extending over sides. Process 30 cookies in food processor until finely ground. Add butter; mix well. Press onto bottom of pan.
BEAT cream cheese, sugar and vanilla in large bowl with mixer until well blended. Add sour cream; mix well. Add eggs, 1 at a time, beating just until blended after each. Chop remaining cookies; stir 1-1/2 cups into batter. Pour over crust; top with remaining chopped cookies.
BAKE 45 min. or until center is almost set. Cool completely. Refrigerate 4 hours. Use foil handles to lift cheesecake from pan before cutting to serve.


TADAAAAA!!!! Say cheeseeee everyone...


MY CUTE LITTLE CHEF


Children love to learn. Cracking eggs, buttering bread and mixing a bowl of batter are all tactile activities that raise their level of understanding in the realms of density, volume and consistency. If your child has taken a certain liking for the activities found in the kitchen, cooking classes for kids may be a rewarding and fun filled adventure for them.


My daughter attended a cooking class organized by Sugar Flour Bangi last month and she had a very wonderful time.


posing before the class start


mama...please don't take my picture


listening or dreaming??..hahaha..


showing the skill

Peace...

How to Choose Jeans for Your Body Type

Looking good isn’t all about size or shape of your body. Everyone can look good, no matter their body type, by choosing the right clothes.

Jeans are a wardrobe essential and can be worn just about anywhere. When shopping for jeans, keep in mind your body type in order to hide minor figure flaws and accentuate the positive. Follow these to tips to learn how to choose the best jeans for your body type.

Plus-Size - go for relaxed fit

Don’t hide in baggy jeans. Contrary to what you might think, oversized clothes won’t disguise your weight. In fact, they’ll make you look heavier. Instead of baggy jeans, select relaxed fit, which give you the extra room you need without being too loose. Avoid jeans with small pockets; they’ll make your butt look bigger. Dark wash or black jeans are a great choice and will make you look thinner.


Tall and thin - Skinny jeans is the salvatore

If you are tall and lean, select skinny jeans because they give some extra attention to hips and thighs. This will give the illusion of a more curvy figure. Choose jeans with rear pockets that are low to make your butt look higher and rounder. Lighter wash jeans also will make you look a little heavier.


Short-waisted
- low rise will do

If you are short-waisted, avoid high-waisted pants at all cost. Instead, select low-rise jeans to help elongate the look of your torso. Flared jeans will also look good because they draw the attention away from your waist.


Petite
- bootcut is made for you

Katie Holmes made cuffed boyfriend jeans popular in the last year, but these aren’t for short women. If you are under 5′4, these jeans will make you look even shorter. Instead choose a pair of bootcut jeans, which will give you a longer, leaner look.


Everyone - 5 pocket classic
The 5-pocket classic or bootcut jeans look good on almost anyone. Look for jeans with a small percentage of spandex for a little stretch. When trying on jeans, make sure to look in the mirror from all angles, including the rear. Bend, twist, sit, squat and do everything you might do in your jeans to make sure they fit properly. Remember, you shouldn’t have to lay down to get your jeans on and your thong shouldn’t show when you sit down.


Article courtesy of thegloss.com

Monday, July 19, 2010

Fun to cook


I'm actually not really fond into cooking. All the while my maid do all the cookings in my house. I dont even bother to learn how to cook until one day she told me that she's going to get married and I need to find replacement for her ( which is not easy to find new maid during the time). Then only I realized that my life wont be as easy as before..without maid, I have to cooks myself for the family. Oh my..this would be disaster..

my beloved maid ....


we miss u Auntie Ogy!!


But then I start to think that my child gonna grow up and one day they will surely ask me to cook for them and I cannot always depend on maid alone. So I decided to learn how to cook 'simple but delicious food'. From there I was then realized that it is fun to cook and when your family praise your cookings, its priceless...


Knowing Your Bag

Women all around the world are spending a huge chunk of their salaries on bag shopping, and most of them have a collection of bags. From hobo bags to sexy clutches, bags are really the number one fashion accessory. This small guide will introduce you to the different variations and styles of handbags.


The Accordian Bag
Named after its resemblance to the accordion instrument, these bags have expanding capabilities. The fabric is pleated together or quilted and stitched in such as way as to allow the bag to expand and contract.


The Baguette Bag
Again, the name of this one has been derived from its similarities to the Baguette bread rool. The bag itself is long and narrow, with a shoulder strap. This type of bag is generally quite small and worn with evening or cocktail dresses.


The Clutch
The clutch bag is generally considered an evening bag. Not only because of its small, subtle size, but because it really compliments and evening outfit. Clutch bags come in a variety of styles and colors and are generally long and rectangular and do not have a handle (hence the clutch).


The Satchel
This type of bag is a small bag that is generally used to carry books and with one sling that is worn over the shoulder. Think of your typical varsiti bag.


The Hobo Bag
The tote bag is similar to the hobo bag accept that is not generally rounded. Tote bags are usuallysquare or rectangular in size.


The Pompadour Bag
This bag is a small pouch bag, generally made out of lace or velvet and is finished off with a chain or cord.

This article is courtesy of Ezineseeker.com


Saturday, July 17, 2010

Red Velvet aka Red Devil Cupcake


I had never seen or heard about Red Velvet aka Red Devil Cupcake before until I started blogging and trying to find some cupcake recipes...then walla...I found a very tempting picture of the cake and since then on I've been wondering how does the cake taste like. After much consideration, I then decided to make some and try it myself just to see how it taste..and the outcome..not bad though..

Here is the recipe that I get from http://www.marthastewart.com/

RED VELVET aka RED DEVIL CUPCAKES

Ingredients (makes 24)
2 1/2 cups cake flour (not self-rising), sifted
2 tbs unsweetened Dutch-process cocoa powder (I used ordinary cocoa powder)
1 tsp salt
1 1/2 cups sugar
1 1/2 cups vegetable oil ( I used corn oil)
2 large eggs, room temperature
1/2 tsp red gel-paste food color ( I used 1 tbs liquid red coloring)
1 tsp pure vanilla extract
1 cup buttermilk (I used 1 cup fresh milk mix up with 1 tbs white distilled vinegar-let it stand for about 10 minutes before using it)
1 1/2 tsp baking soda
2 tsp distilled white vinegar

Directions
1. Preheat oven to 350 degrees. Line standard muffin tins with paper liners. Whisk together cake flour, cocoa, and salt.

2. With an electric mixer on medium-high speed, whisk together sugar and oil until combined. Add eggs, one at a time, beating until each is incorporated, scraping down sides of bowl as needed. Mix in food color and vanilla.

3. Reduce speed to low. Add flour mixture in three batches, alternating with two additions of buttermilk, and whisking well after each. Stir together the baking soda and vinegar in a small bowl (it will foam); add mixture to the batter, and mix on medium speed 10 seconds.

4. Divide batter evenly among lined cups, filling each three-quarter full. Bake, rotating tins halfway through, until a cake tester inserted in centers comes out clean, about 20 minutes. Transfer tins to wire racks to cool completely before removing cupcakes. Cupcakes can be stored overnight at room temperature, or frozen up to 2 months, in airtight containers.

5. To finish, use a small offset spatula to spread cupcakes with frosting. Refrigerate up to 3 days in airtight containers; bring to room temperature before serving.

Cream Cheese Frosting
Ingredients
8 ounces (2 sticks) unsalted butter, room temperature
12 ounces cream cheese, room temperature
4 cups confectioners' sugar, sifted ( I reduced the sugar into 2 1/2 cups)
3/4 tsp pure vanilla extract

Directions
Beat butter and cream cheese with a mixer on medium-high speed until fluffy, 2 to 3 minutes. Reduce speed to low. Add sugar, 1 cup at a time, and then vanilla; mix until smooth. Frosting can be refrigerated for up to 3 days; before using, bring to room temperature, and beat until smooth.
Here are those beautiful and extremely tempting Red Velvet cake and cupcake I saw online..


From Pickycook:


From Womansday:


From Photoshimona :