Feeds RSS
Feeds RSS

Friday, August 13, 2010

Stunningly Gorgeous, Head-to-toe - NOSE

How to Hide a Large Nose
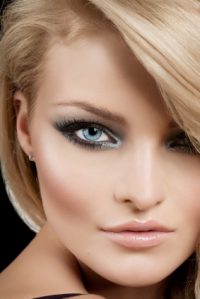
If you have a large nose, you can reduce its prominence through the use of makeup. By shading it, you can effectively hide its large size; it will then appear more in tune with the rest of your facial features.

Step 1
Choose a liquid foundation and powder in shades slightly darker than your skin tone. Find a liquid foundation and powder in shades slightly lighter than your skin tone. The dark and light shades are necessary for contouring.

Step 2
Powder the nose in a natural way to set the base for contouring. Use the blending brush and facial sponge for the most natural look.

Step 3
To hide the appearance of a wide nose, apply the lighter foundation and powder down the center of the nose. Blend into the surrounding areas for a natural look.

Step 4
If you have a long nose, use the foundation and powder that is slightly lighter than your natural skin tone, and apply over and under the tip of the nose.

Step 5
Draw attention away from a large nose with contouring along your cheekbones and jawline. Use the darker shade of foundation and powder, and blend it under the cheekbones and jawline.

Step 6
Apply blush to the cheeks and color to the lips to draw attention away from your nose.

Stunningly Gorgeous, Head-to-toe - CHEEK


How to Highlight Cheekbones
Makeup is the perfect tool for emphasizing our best features. Celebrities already discovered this small trick and they seem to find huge pleasure in adding a sophisticated and slimming quality to their look. Indeed cheekbones have a crucial role in creating a sculpted look.

High cheekbones seem to embody what beauty really means. Besides being really hot these have an essential benefit for those who would like to lengthen and thin their faces. Only with the help of a tiny bronzer and highlighters you'll be able to pull off a dazzling high cheekbone appearance. All you need for the quick makeup is:

•Bronzer that matches your skin tone, still a bit darker than the natural skin color. If you would like to stick to foundation you can also opt for it in 1-2 shades darker, for an emphasizing effect.
•Blush powder or cream blush, doesn't matter the point is to repeatedly match it to your natural skin color. Look for either rose, pinkish or peachy shades. It is vital that the blush blends into the overall makeup.


•Highlighter - you'll find highlighters both in powder and liquid form on the market. However if you find purchasing it a bit difficult, you might use a bright colored blush.
The first move is to create the base for the further makeup. Apply the foundation and the concealer on the right spots. Then head to the next level and sculpt those cheekbones.

Step 1
Start with the darker foundation or the bronzer. Apply it to the hollows of the cheekbones and place it following an upward diagonal. Be careful this slight layer should not be eye-popping. The main aim is to blend it into the overall look. It should resemble a shadow rather than a defined line.

Step 2
Use the highlighter to emphasize the most prominent lines of your cheekbone. Again take care of the blending process, still we didn't arrived at the peek of the makeup. This beauty tool will efficiently reflect the light, emphasizing your cheekbones. The prominent features will start to come to the surface.

Step 3
Finally top the look with the blush applying it on the apples of your cheek, sweeping it upward all throughout the upper section of the cheekbones. Keep the blush far from the eye area, to protect the sensitive skin.
Concentrate on the higher portion of the cheek. The result will be a dashing look, the 3 killer combo makeup adds finesse to your features and creates the illusion of high cheekbone and weight loss even if you only fake it.

Stunningly Gorgeous, Head-to-toe - LIPS


The best lipsticks are long-lasting, perfectly colored and made with ingredients that enhance not only your look but the health of your lips as well. The best lip looks rely on knowing the best colors for your skin. Use these lip tips to keep your makeup beautiful and your lips smooth and soft.

Before adding lip color or gloss, calm your lips for smoother, long lasting color.
If your lips are chapped or dry, lipstick will go on unevenly and fade away fast. Tiny lines around the mouth can trap color, causing lipstick to "bleed"—never a good look! Use a soothing lip treatment or lip balm to moisturize and heal your lips, providing a smooth base for your lip color. Look for calming lip treatment with essential oil of sweet marjoram, lavender, and tarragon, which goes on with a warm tingle and promotes healing. With soft, beautiful lips, your lip color will look and feel better than ever!

Lipstick—a million colors to choose from!
One of the biggest makeup challenges is choosing the right lip color. Some women vary their lipstick in accordance with their wardrobe—a big no-no, since your lipstick is supposed to complement your skin tones!

It's not hard to choose lipstick colors once you know one simple fact. All you need to know is whether your skin tones are "warm" or "cool". It's not about how dark or light you are, or even about your hair or eye color, but what the undertone of your skin is—is it bluish (cool) or yellowish (warm)? Everyone is either warm or cool and it's all about your facial coloring: blondes, brunettes and redheads can be either one.

So how can you tell if you aren't sure? Dig through your makeup bag and find just two shades of any kind of makeup—lip color, eye shadow or blush. Find one color that is orange or rust and another that is pink or lavender. Rub one color on the apple of your cheek and the other color on the apple of the other cheek and then compare. Does one look more "right" than the other? Does one look garish or just wrong? The color that works will show you your skin tone. If the orange color looks right, you have warm tones; if the pink color looks right, you are cool.

Now that you know your skin tone, you are free to choose any lip color in that color family. But that doesn't mean you'll only wear one lipstick shade: you still have plenty to choose from! Take a look at this list of potential lip shades for either coloring:

Warm Colors
Coral, Peachy, Russet, Rust, Amber, Brown, Brick Red, Melon, Salmon, Orange, Sandalwood, Red with yellow undertone, Taupe

Cool Colors
Pink, Raspberry, Cherry, Mulberry, Lavender, Plum, Rose, Strawberry, Crimson, Amethyst, Lilac, Red with blue undertone, Mauve

As you can see, the color names associated with warm and cool tones tend to fall into two groups. The warm tones tend to be earthy, woodsy, with only a couple of fruit names (peach and melon). Cool tones tend to contain the names of berries, which are often shades of pink or purple or reds with blue undertones. Warm and cool women can both wear red lipstick, but the "true red" tend to be bluish, so warm women should look for reds with a slight leaning towards brown or orange. Once you understand your skin tone, the trick is not to fall for a pretty name when the shade doesn't flatter your skin. Lipstick makers know that a lush name, reminiscent of flowers or jewels or romance, can sell a lipstick even when the color looks terrible on most women. So beware!

Don't let the name fool you into buying something that looks wrong on you. Read the name after you've looked at the color!

The best way to get every shade you want is to buy a whole palette of lip colors. But lipstick palettes usually have two or three colors that work and another fifteen that look just awful. If you've ever bought a lip palette, you know what it's like: there are a couple of colors you want, and you have to buy the rest of the palette to get them. They're the two spots where the color's worn to the bottom of the case in a few months while the rest of the compact is untouched. When you're out of the colors you love, the rest goes into a drawer. "I'll think about it later," we say to ourselves while the little pots of unused, unwearable color pile up inside our vanity drawers.

Wouldn't it be great to get a lip palette of every shade you love? To choose each individual color based on what looks great on you? To know you can mix colors with the confidence of knowing that they will blend beautifully because they are in the same color family? And when a beloved color runs low, wouldn't it be great to just replace it and keep the compact! Guess what? You can!

Use a lip pencil or liner to before putting on lip color.
While you don't want to stray too far from the natural shape of your mouth, lip pencils can add clean definition while subtly but powerfully redefining your mouth. Drawn just outside your natural lip line, lip pencil adds fullness; drawn just on the inside, your lips appear slightly thinner.

Want to achieve a luscious pout? Add fullness to the bottom lip with a lip pencil two shades lighter than the one you use on your upper lip.

Love the Julia Roberts look? Soften and enhance your upper lip line by drawing with your lip pencil in a heavy stroke, then smudge ever-so-slightly upwards with the end of your pinkie. Blot, then apply your lipstick to the edge of the original line.

For total freedom in lip color, make sure you have lip liner pencils in several colors. One lip pencil just can't cut it: you'll want to use slightly lighter or darker lip pencils to create the illusion of fullness or to slightly thin out heavier lips.

Great Lip Gloss
You can't buy lip gloss from a drugstore—unless you want a gloppy, sticky, slimy mess, perhaps adorned with little bits of sharp glitter and a heavy bubble-gum scent. Store brands can have lots of confusing ingredients, but we have decoded the makeup terms for their true meaning. Perfect for 'tweens, lip gloss for grown-ups should add subtle shine and color. But the best lip glosses do more than shine you up: they add essential organic oils like tangerine, clove, peppermint, lavender, vanilla, grapefruit and rose. Essential oils not only add health to your lips: their natural scents create instant aromatherapy when applied to the lips. Vanilla and peppermint have been shown to increase happy feelings; grapefruit and tangerine give you a boost of energy; rose and lavender are perfect for calming and soothing stressed nerves. Lip gloss with essential oils that does more than make you look wonderful: it makes you feel wonderful too!

Warm and cool shades apply to your lip gloss choices as they do your lipsticks. Choose colors one shade lighter or darker than your favorite lipsticks for an extra layer of light-loving color, or wear them alone for a natural, pretty look.

Want to maximize your lip color wardrobe? Choose your lipsticks first, then add lip pencils one shade darker than each lipstick, and finish by picking lip glosses one shade lighter than each lipstick. Make sure your lip pencils, lipsticks and glosses are all from the same color family that matches your skin tone. Don't forget a calming lip treatment to protect and smooth no matter which colors you wear!

For Work to Dinner to Dancing: A Lip for All Reasons
Your daily lip color should be more muted than your night-time look, but we often dash from work to an evening out without returning home. With a small, portable lip palette, you can bring a daytime and a nighttime shade along with complementary lip pencils with no extra hassle—they fit into your purse! Take along a miniature compact with your daily shade, and add a second, more dramatic color alongside it. Or wear a gloss for day and add a lipstick for night. When you're getting ready for the evening, your glammed-up lip color will be right—and right where you need it.