Feeds RSS
Feeds RSS

Thursday, August 19, 2010

Tips on How to Feel and Look Gorgeous Everday

For sure all ladies out there always wanted and wish that they look gorgeous all the time. However, looking gorgeous at all times is about allowing you the necessary time for pampering yourself. It is a must to spent at least half an hour for make-up hair and everything else regarding your personal appearance.

Even celebrities do require touch-ups to look as great as they do, so why not make sure to look evenly hot on a daily basis. One of the things that seems to be pretty difficult to maintain is a regular make-up routine, which every woman should allow herself time for.

With time busy schedules take every extra time one reserved for pampering, and make-up and hair becomes a 5 minute routine. The faster the better only this is not exactly what femininity is all about. It must be difficult to make time for everything but nothing can top the sentiment of feeling good in your own skin.

How many times has it been when you just rushed out of the house and just took a quick glimpse in the mirror? It's probably been many times and it's most likely going to become a routine. This is not something to desire. Women should maintain and emphasize their beauty because this is what makes women look and feel confident and always look gorgeous.

Looking great requires time, patience and a little bit of skill. Every woman can look great, no matter the race or the age, all that is needed is a little bit of interest and ambition to emphasize all your beauty.
Here are some tips to help you look gorgeous every minute:

•Arrange your schedule to allow yourself about 40 minutes to spoil yourself every day.

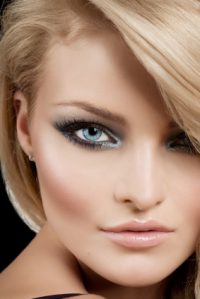
•Learn about how to apply make-up for your face shape. It is very important to apply the eyeshadow according to your eye shape to emphasize them and conceal flaws. Make-up can be applied to conceal and emphasize certain facial features. This can make all the difference in the world when it comes to appearance even when wearing natural looking make-up.

•Pay attention to your hairstyle as well. Hair plays an essential role in personal aspect so it is important to get the right style for your face shape and hair type. Style your hair to your advantage, maintain it healthy with regular trims and try different hairstyles to be able to sport different looks with maximum styling ease.

•Go for regular facials because this way you can improve or maintain a perfect looking complexion. Your skin will look and feel healthy, causing you to radiate.

•Get your eyebrows done and remove any unaesthetic hair off your body. Soft baby skin looks amazing and feels as great as well.

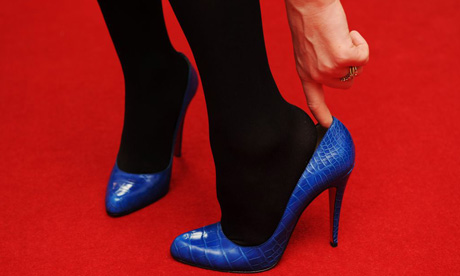
•Pay attention to your outfit as well. Try to dress age appropriate and adapt your make-up according to the outfit. Opt for a more natural look if you are opting for a more sophisticated outfit and opt for a more powerful make-up for a simple or evening outfit.

•Don't forget to put on your favorite perfume because fragrance plays an important role in feeling good. Your favorite scent can lift your spirit and make you more happy.

•Choose stylish pajamas because this way you will feel and look gorgeous from when you wake up until you go back to sleep.

You are a woman and you should make sure you look your best every time. Beauty is what defines women so try to allow yourself as much time as you can for pampering. Try your best and have fun with it. You will surely not regret it and everyone around you will complement you for your gorgeous looks.

Friday, August 13, 2010

Stunningly Gorgeous, Head-to-toe - TEETH


How to Whiten Teeth At Home

Step 1
A great teeth-whitener is baking soda. Not only does baking soda loosen built up stains and discoloration, it also cleans better than many toothpastes on the market today.

Step 2

A great way to whiten teeth with baking soda is to mix a few tablespoons in a small cup of water and use as a mouthwash for a few minutes before going to bed at night. Rinse once, and allow a small amount to stay on your teeth overnight. This will allow it to loosen surface stains overnight.

Step 3
Follow this up by brushing with a toothpaste and baking soda mixture each morning.

Step 4
After just a few weeks, you will begin to see major improvements in the whitening of your teeth.

Stunningly Gorgeous, Head-to-toe - NOSE

How to Hide a Large Nose
If you have a large nose, you can reduce its prominence through the use of makeup. By shading it, you can effectively hide its large size; it will then appear more in tune with the rest of your facial features.

Step 1
Choose a liquid foundation and powder in shades slightly darker than your skin tone. Find a liquid foundation and powder in shades slightly lighter than your skin tone. The dark and light shades are necessary for contouring.

Step 2
Powder the nose in a natural way to set the base for contouring. Use the blending brush and facial sponge for the most natural look.

Step 3
To hide the appearance of a wide nose, apply the lighter foundation and powder down the center of the nose. Blend into the surrounding areas for a natural look.

Step 4
If you have a long nose, use the foundation and powder that is slightly lighter than your natural skin tone, and apply over and under the tip of the nose.

Step 5
Draw attention away from a large nose with contouring along your cheekbones and jawline. Use the darker shade of foundation and powder, and blend it under the cheekbones and jawline.

Step 6
Apply blush to the cheeks and color to the lips to draw attention away from your nose.

Stunningly Gorgeous, Head-to-toe - CHEEK


How to Highlight Cheekbones
Makeup is the perfect tool for emphasizing our best features. Celebrities already discovered this small trick and they seem to find huge pleasure in adding a sophisticated and slimming quality to their look. Indeed cheekbones have a crucial role in creating a sculpted look.

High cheekbones seem to embody what beauty really means. Besides being really hot these have an essential benefit for those who would like to lengthen and thin their faces. Only with the help of a tiny bronzer and highlighters you'll be able to pull off a dazzling high cheekbone appearance. All you need for the quick makeup is:

•Bronzer that matches your skin tone, still a bit darker than the natural skin color. If you would like to stick to foundation you can also opt for it in 1-2 shades darker, for an emphasizing effect.
•Blush powder or cream blush, doesn't matter the point is to repeatedly match it to your natural skin color. Look for either rose, pinkish or peachy shades. It is vital that the blush blends into the overall makeup.


•Highlighter - you'll find highlighters both in powder and liquid form on the market. However if you find purchasing it a bit difficult, you might use a bright colored blush.
The first move is to create the base for the further makeup. Apply the foundation and the concealer on the right spots. Then head to the next level and sculpt those cheekbones.

Step 1
Start with the darker foundation or the bronzer. Apply it to the hollows of the cheekbones and place it following an upward diagonal. Be careful this slight layer should not be eye-popping. The main aim is to blend it into the overall look. It should resemble a shadow rather than a defined line.

Step 2
Use the highlighter to emphasize the most prominent lines of your cheekbone. Again take care of the blending process, still we didn't arrived at the peek of the makeup. This beauty tool will efficiently reflect the light, emphasizing your cheekbones. The prominent features will start to come to the surface.

Step 3
Finally top the look with the blush applying it on the apples of your cheek, sweeping it upward all throughout the upper section of the cheekbones. Keep the blush far from the eye area, to protect the sensitive skin.
Concentrate on the higher portion of the cheek. The result will be a dashing look, the 3 killer combo makeup adds finesse to your features and creates the illusion of high cheekbone and weight loss even if you only fake it.

Stunningly Gorgeous, Head-to-toe - LIPS


The best lipsticks are long-lasting, perfectly colored and made with ingredients that enhance not only your look but the health of your lips as well. The best lip looks rely on knowing the best colors for your skin. Use these lip tips to keep your makeup beautiful and your lips smooth and soft.

Before adding lip color or gloss, calm your lips for smoother, long lasting color.
If your lips are chapped or dry, lipstick will go on unevenly and fade away fast. Tiny lines around the mouth can trap color, causing lipstick to "bleed"—never a good look! Use a soothing lip treatment or lip balm to moisturize and heal your lips, providing a smooth base for your lip color. Look for calming lip treatment with essential oil of sweet marjoram, lavender, and tarragon, which goes on with a warm tingle and promotes healing. With soft, beautiful lips, your lip color will look and feel better than ever!

Lipstick—a million colors to choose from!
One of the biggest makeup challenges is choosing the right lip color. Some women vary their lipstick in accordance with their wardrobe—a big no-no, since your lipstick is supposed to complement your skin tones!

It's not hard to choose lipstick colors once you know one simple fact. All you need to know is whether your skin tones are "warm" or "cool". It's not about how dark or light you are, or even about your hair or eye color, but what the undertone of your skin is—is it bluish (cool) or yellowish (warm)? Everyone is either warm or cool and it's all about your facial coloring: blondes, brunettes and redheads can be either one.

So how can you tell if you aren't sure? Dig through your makeup bag and find just two shades of any kind of makeup—lip color, eye shadow or blush. Find one color that is orange or rust and another that is pink or lavender. Rub one color on the apple of your cheek and the other color on the apple of the other cheek and then compare. Does one look more "right" than the other? Does one look garish or just wrong? The color that works will show you your skin tone. If the orange color looks right, you have warm tones; if the pink color looks right, you are cool.

Now that you know your skin tone, you are free to choose any lip color in that color family. But that doesn't mean you'll only wear one lipstick shade: you still have plenty to choose from! Take a look at this list of potential lip shades for either coloring:

Warm Colors
Coral, Peachy, Russet, Rust, Amber, Brown, Brick Red, Melon, Salmon, Orange, Sandalwood, Red with yellow undertone, Taupe

Cool Colors
Pink, Raspberry, Cherry, Mulberry, Lavender, Plum, Rose, Strawberry, Crimson, Amethyst, Lilac, Red with blue undertone, Mauve

As you can see, the color names associated with warm and cool tones tend to fall into two groups. The warm tones tend to be earthy, woodsy, with only a couple of fruit names (peach and melon). Cool tones tend to contain the names of berries, which are often shades of pink or purple or reds with blue undertones. Warm and cool women can both wear red lipstick, but the "true red" tend to be bluish, so warm women should look for reds with a slight leaning towards brown or orange. Once you understand your skin tone, the trick is not to fall for a pretty name when the shade doesn't flatter your skin. Lipstick makers know that a lush name, reminiscent of flowers or jewels or romance, can sell a lipstick even when the color looks terrible on most women. So beware!

Don't let the name fool you into buying something that looks wrong on you. Read the name after you've looked at the color!

The best way to get every shade you want is to buy a whole palette of lip colors. But lipstick palettes usually have two or three colors that work and another fifteen that look just awful. If you've ever bought a lip palette, you know what it's like: there are a couple of colors you want, and you have to buy the rest of the palette to get them. They're the two spots where the color's worn to the bottom of the case in a few months while the rest of the compact is untouched. When you're out of the colors you love, the rest goes into a drawer. "I'll think about it later," we say to ourselves while the little pots of unused, unwearable color pile up inside our vanity drawers.

Wouldn't it be great to get a lip palette of every shade you love? To choose each individual color based on what looks great on you? To know you can mix colors with the confidence of knowing that they will blend beautifully because they are in the same color family? And when a beloved color runs low, wouldn't it be great to just replace it and keep the compact! Guess what? You can!

Use a lip pencil or liner to before putting on lip color.
While you don't want to stray too far from the natural shape of your mouth, lip pencils can add clean definition while subtly but powerfully redefining your mouth. Drawn just outside your natural lip line, lip pencil adds fullness; drawn just on the inside, your lips appear slightly thinner.

Want to achieve a luscious pout? Add fullness to the bottom lip with a lip pencil two shades lighter than the one you use on your upper lip.

Love the Julia Roberts look? Soften and enhance your upper lip line by drawing with your lip pencil in a heavy stroke, then smudge ever-so-slightly upwards with the end of your pinkie. Blot, then apply your lipstick to the edge of the original line.

For total freedom in lip color, make sure you have lip liner pencils in several colors. One lip pencil just can't cut it: you'll want to use slightly lighter or darker lip pencils to create the illusion of fullness or to slightly thin out heavier lips.

Great Lip Gloss
You can't buy lip gloss from a drugstore—unless you want a gloppy, sticky, slimy mess, perhaps adorned with little bits of sharp glitter and a heavy bubble-gum scent. Store brands can have lots of confusing ingredients, but we have decoded the makeup terms for their true meaning. Perfect for 'tweens, lip gloss for grown-ups should add subtle shine and color. But the best lip glosses do more than shine you up: they add essential organic oils like tangerine, clove, peppermint, lavender, vanilla, grapefruit and rose. Essential oils not only add health to your lips: their natural scents create instant aromatherapy when applied to the lips. Vanilla and peppermint have been shown to increase happy feelings; grapefruit and tangerine give you a boost of energy; rose and lavender are perfect for calming and soothing stressed nerves. Lip gloss with essential oils that does more than make you look wonderful: it makes you feel wonderful too!

Warm and cool shades apply to your lip gloss choices as they do your lipsticks. Choose colors one shade lighter or darker than your favorite lipsticks for an extra layer of light-loving color, or wear them alone for a natural, pretty look.

Want to maximize your lip color wardrobe? Choose your lipsticks first, then add lip pencils one shade darker than each lipstick, and finish by picking lip glosses one shade lighter than each lipstick. Make sure your lip pencils, lipsticks and glosses are all from the same color family that matches your skin tone. Don't forget a calming lip treatment to protect and smooth no matter which colors you wear!

For Work to Dinner to Dancing: A Lip for All Reasons
Your daily lip color should be more muted than your night-time look, but we often dash from work to an evening out without returning home. With a small, portable lip palette, you can bring a daytime and a nighttime shade along with complementary lip pencils with no extra hassle—they fit into your purse! Take along a miniature compact with your daily shade, and add a second, more dramatic color alongside it. Or wear a gloss for day and add a lipstick for night. When you're getting ready for the evening, your glammed-up lip color will be right—and right where you need it.

Wednesday, August 4, 2010

Blackheads Removal Tips That Works

Acne treatment is more than just curing pimples and spots. It includes getting rid of blackheads and whiteheads as well.

Blackheads are a type of acne vulgaris and are also known as open comedones. It is mainly caused by excess sebum that clogged the pores.

When excess oils are combined with trapped toxins and subsequently exposed to oxidization, blackhead becomes the result.

Blackheads can become difficult to remove and ugly if they are left too long and untreated. People with oily skin are most susceptible to having blackheads.

Whitehead is yet another type of acne vulgaris. However, unlike blackheads, it is not so obvious.

Whiteheads are mainly caused by excess oils and dead skin cells that clog the pores.

Many people have the habit of squeezing the blackheads and whiteheads on their skin. This type of treatment can be very dangerous as it may cause inflammation and scarring.

It will take time for you to remove blackheads and whiteheads. However, you can use acne products that are effective in removing them without any infection or scarring.

Salicylic Acid - assist in getting rid of bacteria and excess oil. It is a very effective solution for removing blackheads.

AHA - this is very helpful for removing whiteheads and dead skin cells.

Benzoyl Peroxide - not as effective as the above for removing blackheads but it is used commonly for treating pimples.

Accutane - this is used only if you have very severe cystic acne. If possible, try other methods and keep this as a last resort.

Home Remedy - you can also use a face steam to remove whiteheads. Add some essential oils to the steamer. The essential oil can be use for anti bacteria purposes.

Lemon juice can be used as a toner to help reduce excess oil on the skin.

You can also use pore strips to remove loose blackheads and whiteheads. If you combine it with the usage of salicylic acid, you should be able to remove these impurities quite successfully.


Keep in mind not to overuse on the pore strips. It is best to use salicylic acid first and wait till the blackheads are "loosen" before applying the strips.


The Easiest Nutrition Guidelines Ever


1)Eat for your goal
If needing to lose weight eat below your caloric needs. No more than 30% cut.
If needing to gain weight then eat above. Increase by 15% as needed.

2) Eat for balance
Get at least 30% of every nutrient in a day (protein/carbs/fats). The other 10% is to do whatever you want with it.

3) Eat the right foods
This goes as follows:-

Protein -
Lean and Complete (chicken, turkey, egg whites, whey)

Carbs-
Fruits and veggies should make up the majority of your diet and be paired with every meal.

Fats-
Poly/mono fat balance high(fish oils, nuts, olive oil);Low Saturated fats

4) Eat often
Eat 4-6 meals a day.
Each meal should contain 1 complete protein.
Each meal should contain 1 carb source of either fruit/veggies.

5) Eat 1 ingredient items
85% of your meals should be of one ingredient items.
An apples ingredients are an apple. An egg is an egg. You can certainly mix and match on ingredient items, but other than that your items 85% of the time should only be 1 ingredient items.


6) Drink Water

1/2 to 1 gallon a day for women who exercises, 1 to 1 1/2 gallon for men who exercise.


That's it. If you stick to that you will get results, plain and simple :).


source: articles.com.my


Tapai Pulut (Fermented White Glutinous Rice)

Ramadhan is around the corner..since my hubby love Tapai Pulut sooo much..I decided to try making some just to impress him..hahaha.. So after sending my little pearl to Smart Reader this morning, I went to the Indian grocery near my house and buy 1kg of white glutinous rice and 2 pieces of ragi (2 pieces of it cost only RM1.40) but I used 1 only. The recipe...I got it from Rasa Magazine that I bought 6 years ago..wallaweh..lama tuh..anyway..it still relevant though.

Ragi
I soaked all the glutinous before I going to sleep. The next morning, after sending little pearl to school, I went straight to the kitchen to drain the rice and then cooked it in the steamer.

I read many story about tapai will only turned all right if the person who prepares it is very clean and has a peaceful mind. “Kalau serabut-serabut tak jadinya tapai tuh.” So I'm trying very hard to make myself calm and thinking of nice and happy things so that the tapai will turn sweet and nice..hahaha..funny ha..( this is my first attempt doing it myself..so takut x jadi la..)

After the cooked glutinous rice are cold enough..(they said if we put the ragi before it cold enough, tapai will turn sour)..now spread the cooked glutinous rice on a large tray (we call it talam) to as thin a layer without pressing or compressing the rice.


Then I dusting the ragi powder on top of the layer (I've crushed the ragi by putting it into a plastic bag, than roll it with doh roller). Remember to switch off the fan or the draught will blow the ragi dust into your lung instead of to the top of the rice.

I cover my hand with thin plastic glove and mixed the rice with the ragi powder. Then it was spread out again and another thin dusting of ragi powder and mixed again. During the whole process I make sure of cleanliness and all spoon, fingers or plastic cover were clean and dry.

I did not wrap the rice in banana or other types of leaves for fear of wasted effort if the tapai did not turn out well. I just make the rice into a rice ball and put it into few plastic container recycling the one that I collected each time I bought tapai from Pasar Malam for my hubby. I then cover it and wrap the container with 2-3 layers of cloth tightly and place it in a dark place (I put them in the store). I used old clean towel to wrap the container. This is to ensure the rice is fermented in a slightly warm and close space, sort of to induce a low grade fewer.


My advise for beginners like me, to scoop one lump of rice and put it in a small Tupperware and keep it airtight and in dark place for you to check whether your tapai is ready by 36 hours or by 48 hours. Mine was soft and juicy by 36 hours but for the extra sweetness, it was left for 48 hours. Then take it out and chill.

Taraaaa…..yummy…yummy…yummy…

Fermented white glutinous rice or Tapai pulut, nice and sweet as it can be. The perfect white colour and the perfect sweetness of it, reflects the pureness of heart of the one who prepared it, hehehehe....

7 Steps to Great Makeup


1. Avoid wearing too much

Makeup is meant to enhance features not bring negative attention to you. That's what wearing too much makeup will do; it will bring you unwanted attention. Don't wear too much of anything such as:

i) Eyeliner: dark, thick eyeliner will make you look overdone and will ruin the rest of your makeup.

ii) Mascara: too much mascara looks fake and will flake. It looks especially bad if worn with thick eyeliner or dark blue eye eye shadow.

iii) Foundation: Make sure your foundation is the same color as your skin. Foundation is meant to protect and give the face a smooth look. The magic word is blend.

iv) Powder:The same holds true for powder - not too much. Also, be sure to blend your makeup so there are no obvious lines.

2. Lips

Apply lip liner to completely cover the lips, add color and your lipstick will stay on much longer. Make sure your lip liner doesn't show. Also, your lip color should match your skin tone; wear cool colors if you have cool coloring and warm colors if you have warm coloring. If you want to make your lips look smaller, keep your liner on the inside of your lips. However, if you decide to make your lips look larger, going outside the natural outline of you lips is a mistake. This can look quite messy and unnatural.

3. Appropriate makeup

Wear makeup that is appropriate for the occasion. If you are going to the beach you shouldn't wear the same or as much makeup as you would if you were going dancing. Also, when you are in daylight your makeup should be a lighter than when you are out for the evening.

4. Too little or no makeup

Some women don't wear makeup because they are not sure how to use it and are afraid of being overdone. If you are unsure, start will light colours in your shade. Start slowly and add one product at a time. Maybe start with foundation, add mascara, blush or lipstick. If you are not used to wearing makeup, using a lot a first may be a little too much for you, so start slowly. The bottom line is a little is better than none. If you are still unsure seek professional advice.

5. Overall look

When your makeup is completed it should look natural. That means avoiding colours that clash. If you have dark skin and hair you will look better in darker shades; light colours will make you look washed out. If your hair and skin tone are light, light colours will look better on you. Dark makeup will make you look older and harsh. If you have oily skin, first use oil control moisturizer and foundation. Then be sure to wear loose powder, keeping pressed powder with you for touch ups.

6. Hair color

Your hair color should also be in harmony with your skin. If you have dark hair and you want to add color, keep it close to the same shade. If you have light hair, use light colors. As you age your skin will lighten, so should your hair color. One last thing about hair color - if you do color you hair be sure you keep it up, don't let your roots show.

7. One last thing

Keep makeup looking fresh all day by doing regular touch ups. Don't let your makeup fade or crease. Smile!!!

Source: Free Articles

Cool Tricks on De-puffing Your Eye Bags


After crying a river of tears, having too much booze the night before, or spending little time for sleep, you may find yourself with red puffy eyes. Although you can cover your eye bags with a cool pair of sunglasses, you still have to deal with your eye problem when you have to remove your shades. What's more, bags under the eyes are usually accompanied by other problems such as dark circles or extreme redness.

Puffy eyes usually last for hours or a couple of days. If you are not going anywhere, it is actually good for you to just let nature determine when your poofed-up eyes are going to deflate. However, if you have an important meeting, a date, or you are going to attend a special occasion, having eye bag woes can really be annoying. Here are some tricks on how you can de-puff your eye bags in a jiffy:

Prevention Is Best

Some people are prone to eye bags, while others are not. If you are one of the individuals who seem to be prone to having swollen eyes, then you should stay away from things that are causing your eyes to puff.

If you have an important date, you should remember to sleep well the night before. Also, make sure that you don't go on an alcohol spree, which may be responsible for fluid retention. Getting easy with salty foods may also be a good idea because like alcohol, too
much salt can also make you retain much water.

Simple Eye Massage

If you were not able to prevent your eyes from becoming swollen, then do not despair. There are plenty of things you can do, such as performing eye massage to help reduce inflammation.

Using your ring finger, simply massage your eye area in circular motion, starting from your nasal sinuses then to the cheeks. Make sure that you slightly push the skin upwards so as not to cause wrinkles. Repeat the massage for about five times on each eye. Gently massaging the area will help flush out pooled fluid faster.

Soothe Your Eyes With A Cool Eye Mask

Placing a chilled eye mask (choose the one without holes for more coverage) on your eyes for 10 to 15 minutes will help soothe your eyes. Moreover, your blood vessels will constrict or tighten due to the cold temperature. This will help facilitate draining of fluid located beneath the skin under your eyes. If you do not have a plastic eye mask, you can use chilled cucumbers or used teabags.

Stay Away From Hot Beverages

If you have swollen eyes, it would be best for you to drink plenty of cold water or other cold beverages. As mentioned earlier, the cool temperature encourages blood vessels to constrict, which will help in promoting better fluid drainage. Basically, the bags under your eyes are simply water or fluid that was not properly flushed out of your system.

Say No To Exfoliation

It would be best for you to skip using products that have ingredients such as salicylic acid, alpha hydroxy acid, and retinoids. These ingredients could irritate your skin and make swelling much worse.

Skip The Eyeliner

If you still have eye bags even after you performed the tricks above, then you need to skip eyeliner for the day. This makeup is used to enhance the shape of the eyes so if you have swollen eyes, the eyeliner will only highlight the flaw. Instead, use an eye shadow that is of the same shade of your upper eyelid to mask the swelling. You can also sweep the same color just beneath your lower lashes to help cover the flaw.

Tuesday, August 3, 2010

Food Habits Tips During Ramadhan


This article provides useful advice on how to avoid some common problems encountered in Ramadhan. If followed, it would enable one to fast comfortably and enjoy fully the spiritual benefits of Ramadhan.

Come Ramadhan, our diet is radically altered. Our meals get condensed in mornings and evenings, with no intake in-between for an extended period of time. For some of us, the intake of oily foods skyrockets. These changes in diet aren't well received by everyone.

Dr. Farouk Haffejee of the Islamic Medical Association of South Africa (Durban) has created a list of recommendations for dealing with Ramadhan in a healthy fashion. They deal with common problems encountered in Ramadhan.

Dr. Haffejee suggests that in the month of Ramadhan, "our diet should not differ very much from our normal diet and should be as simple as possible." He says that our diet should maintain our normal weight, although he does mention that if one is over-weight, Ramadhan is a good time to shed some pounds.

He also recommends foods that last longer. "In view of the long hours of fasting, we should consume slow digesting foods including fibre containing-foods rather than fast-digesting foods. Slow digesting foods last up to 8 hours, while fast-digesting foods last for only 3 to 4 hours," writes Dr. Haffejee.

Slow-digesting foods are foods that contain grains and seeds such as barley, wheat, oats, semolina, beans, lentils, wholemeal flour, and unpolished rice. These are called complex carbohydrates.

Fast-burning foods are foods that contain ingredients such as sugar and white flour. They are called refined carbohydrates.

According to Dr. Haffejee, whole wheat, grains, seeds, vegetables(like green beans, peas, and spinach), fruit with skin, dried fruit (such as dried apricots, figs, prunes, and almonds) are all examples of fibre-containing foods.

Dr. Haffejee says that meals in Ramadhan should be well-balanced, and they should contain foods from each food group, such as fruits, vegetables, meat/chicken/fish, bread/cereals and dairy products.


He discourages fried foods that some of us are addicted to.

"Fried foods are unhealthy and should be limited. They cause
indigestion, heart-burn, and weight problems," Dr. Haffejee points out.

Below are Dr. Haffejee's recommendations for a Ramadhan diet:

AVOID:

Fried and fatty foods.
Foods containing too much sugar.
Over-eating especially at suhoor.
Too much tea at suhoor: Tea makes you pass more urine taking with it
valuable mineral salts that your body would need during the day.
Smoking cigarettes: If you cannot give up smoking, cut down gradually
starting a few weeks before Ramadhan. Smoking is unhealthy and one should stop completely.

EAT:

Complex carbohydrates at suhoor so that the food lasts longer making
you less hungry.
Dates are excellent source of sugar, fibre, carbohydrates, potassium
and magnesium.
Almonds are rich in protein and fibre with less fat.
Bananas are a good source of potassium, magnesium and carbohydrates.

DRINK:

As much water or fruit juices as possible between iftar and bedtime so that your body may adjust fluid levels in time.

Below, Dr. Haffejee has listed common health issues faced in Ramadhan, their causes, and their remedies:

CONSTIPATION
Constipation can cause piles (haemorrhoids), fissures (painful cracks in anal canal) and indigestion with a bloated feeling.
Causes: Too much refined foods, too little water and not enough fibre in the diet.
Remedy: Avoid excessive refined foods, increase water intake, use bran in baking and brown flour when making flatbread.

INDIGESTION AND WIND
Causes: Over-eating. Too many fried and fatty foods, spicy foods, and foods that produce wind e.g. eggs, cabbage, lentils. Carbonated drinks like Cola also produce gas.
Remedy: Do not over-eat, drink fruit juices or better still, drink water. Avoid fried foods, add ajmor to wind-producing foods.

LETHARGY ('low blood pressure') Excessive sweating, weakness, tiredness, lack of energy, dizziness, especially on getting up from sitting position, pale appearance and feeling faint are symptoms associated with "low blood pressure". This tends to occur towards the afternoon.
Causes: Too little fluid intake, decreased salt intake.
Remedy: Keep cool, increase fluid and salt intake.
Caution: Low blood pressure should be confirmed by taking a blood pressure reading when symptoms are present. Persons with high blood pressure may need their medication adjusted during Ramadhan. They should consult their doctor.

HEADACHE
Causes: Caffeine and tobacco-withdrawal, doing too much in one day, lack of sleep, and hunger. Usually occur as the day goes by and worsens at the end of the day. When associated with "low blood pressure", the headache can be quite severe and can also cause nausea before Iftar.
Remedy: Cut down caffeine and tobacco slowly starting a week or two before Ramadhan. Herbal and caffeine-free teas may be substituted. Reorganise your schedule during the Ramadan to have adequate sleep.

LOW BLOOD SUGAR
Weakness, dizziness, tiredness, poor concentration, perspiring easily, feeling shaky (tremor), unable to perform physical activities, headache, palpitations are symptoms of low blood sugar.
Causes (in non-diabetics): Having too much sugar i.e. refined carbohydrates especially at suhoor. The body produces too much insulin causing the blood glucose to drop.
Remedy: Eat something at suhoor and limit sugar-containing foods and drinks.
Caution: Diabetics may need to adjust their medication in Ramadhan. Consult your doctor.

MUSCLE CRAMPS
Causes: Inadequate intake of calcium, magnesium and potassium foods.
Remedy: Eat foods rich in the above minerals e.g. vegetables, fruit, dairy products, meat and dates.
Caution: Those on high blood pressure medication and with kidney stone problems should consult their doctor.

PEPTIC ULCERS, HEART BURN, GASTRITIS AND HIATUS HERNIA
Increased acid levels in the empty stomach in Ramadhan aggravate the above conditions. It presents a burning feeling in the stomach area under the ribs and can extend up to the throat. Spicy foods, coffee, and Cola drinks worsen these conditions.

Medications are available to control acid levels in the stomach. People with proven peptic ulcers and hiatus hernia should consult their doctor well before Ramadhan.

KIDNEY STONES
Kidney stones may occur in people who have less liquids to drink. Therefore, it is essential to drink extra liquids to prevent stone formation.

JOINT PAINS
Causes: During Ramadhan, when extra Salah are performed, the pressure on the knee joints increases. In the elderly and those with arthritis, this may result in pain, stiffness, swelling and discomfort.
Remedy: Lose weight so that the knees do not have to carry any extra load. Exercise the lower limbs before Ramadhan so that they can be prepared for the additional strain. Being physically fit allows greater fulfillment, thus enabling one to be able to perform Salah with ease.


Source: islam101.com

Foot Care Tips For Healty Feet - Part 3


SAVE YOUR FEET


Wearing killer heels, especially the ones with pointy toes can cause problems ranging from common concerns like bunions, corns, and calluses to more complex issues like misshapen hammertoes or that excruciating pain at the ball of the foot that seems to grow worse with each passing year. Heels can be worn without injury if the proper size and shape is worn. Not all feet can wear pointy shoes. A box end or a more rounded toe is a more comfortable option. The right shoe should be comfortable all day, right up to the evening.


TIPS FOR WEARING HIGH HEELS:
1. It's wise to keep killer heels for special occasions. Save backless high-heeled shoes for evening glamor. Backless shoes force your toes to claw as you walk, straining the muscles if worn over a long period.
2. Vary your heel heights from day to day, one day wearing low heels, and the next day slightly higher heels.

3. For everyday use, keep heel height to about 4cm.

4. Consider wearing shoes with a strap or lace over the instep rather than slip-ons. This will help stop your foot sliding forward, a bit like a seatbelt in a car.


TIPS FOR CHOOSING HIGH HEELS:
1. Never shop for high heels in the morning. Feet swell during the day and most likely, you'll want to wear your heels at night anyway.

2. Be open to trying a shoe in a different size. Sizes vary among manufacturers. Sometimes even a different style from the same manufacturer will require you to wear a different size.

3. Check the width of the shoe. If your foot is wider than the shoe when you are standing up, the shoe is too narrow for your foot.

4. Try on both shoes and walk around. If the shoes are not comfortable when you try them on they will not "break in" and become more comfortable. Don't allow yourself to buy beautiful shoes that you won't enjoy wearing.

Foot Care Tips For Healty Feet - Part 2

CHOOSING THE RIGHT SHOES

Always choose your shoes with care because ill-fitting shoes are the ones that generate a host of problems for the foot. In fact, many adults' foot problem occur because they've worn poorly fitting shoes throughout their life. The problem surfaces when people want to be flashy and stylish but forget about foot comfort. To ensure perfect fit, here's a handy guide from Scholl Footwear to keep your feet happy:

Length. Your shoe should be approximately 1cm longer than your foot to ensure adequate but secure movement and prevent the toes rubbing against the forward edge. If you're unsure of the fit, push your foot as far forward as possible and see what gap remains at the heel end. (Always measure the shoe length in relation to your longest toe. For many people this is the second toe and not the big toe!)

Width. The width of the shoe should be snug against the outer edges of the foot at its widest point. (Check that there's no chaffing of pressure points.) This ensures a secure fit that prevents friction rub due to foot slide. If you can't wriggle your toes, then the shoes are too tight.

Depth. The upper side of the shoe should not be pushing down on the top of the foot-particularly at the toe end. Such pressure can lead to skin irritation, nail problems and toe cramps and curling. You should also flex your foot with the shoe on to confirm that the depth of the shoe is suitable.

Heel. The shoe should hold the foot firmly around the heel. The inner side of the heel should also be padded to absorb impact of walking. Low-heeled shoes (up to 4cm) are best suited to supporting the foot's natural angle and the body posture when walking or standing.

The Inner Sole. The inner sole should be slightly raised in the midfoot area to support the natural contours of the foot's arches. The area under the big toe should be flat as any raise here would interfere with the big toe's role in providing leverage and stability when walking.

Lining. The lining should be smooth and totally free of wrinkles or any raised stitching. Irritants here can damage the skin and cause muscles to cramp as the foot tries to avoid the sore area.

The Upper. The shoe's upper side can be made from any number of materials but all should provide pliancy to ensure the foot is uninhibited when moving. Leather uppers allow the foot to breathe - providing greater comfort and less risk of foot odor.

The Outer Sole. The material used should be light but durable and preferably carry a tread imprint to help the foot grip the ground. It should also give adequate underfoot protection from stones and other sharp objects.

Tightness & Adjustability. If possible, select shoes with laces, ties or buckles. This allows you to adjust the fit according to the foot's needs.

Trial and Error. Always try on both shoes when testing out a potential purchase. Many people have different sized feet and the fit of each shoe may therefore differ. Make sure you stand in the shoes as the feet spread in width as they bear the body's weight. It's also a good idea to try on shoes in the afternoon when the feet are at their biggest.